
The only reason i started making paneer at home was when I looked at the price of the same at the shelves in Indian Grocery Stores.. you could actually make 4 times the quantity at home for what you pay at store... My Mom rules her kitchen and my MIL rules hers as well, so never had the opportunity to try new things like this before.. so that was my excuse. But after coming here, its always homemade paneer for my recipes(other than emergency times like party). I feel so satisfied serving my hubby and my little one with my handmade paneer....

I started making paneer using lemon juice only. I never wanted to take risk making them using curd as it didn't work well when i tried some months ago... i do not prefer vinegar or citric powder method as well.. But one day when i had too little lemon juice and had to make paneer, i decided to use curd with lemon juice --- TAN-TA-DA it worked very well.

Result = Soft paneer + no lemon juice flavour + perfect to cut. From then on I changed my method from adding only lemon juice to mixing curd and lemon together.
Ingredients:
Milk - 6 cups (i used 2%)
Lemon juice - 2 tablespoons
Homemade Curd - 1/4 cup
Ice cubes - a big bowl full
Method:
- Whisk Curd and lemon juice in a separate bowl.

- Boil the milk. once the milk rises slow down the stove to low flame.

- Add Curd and lemon juice mix and keep stirring rising the flame to medium.

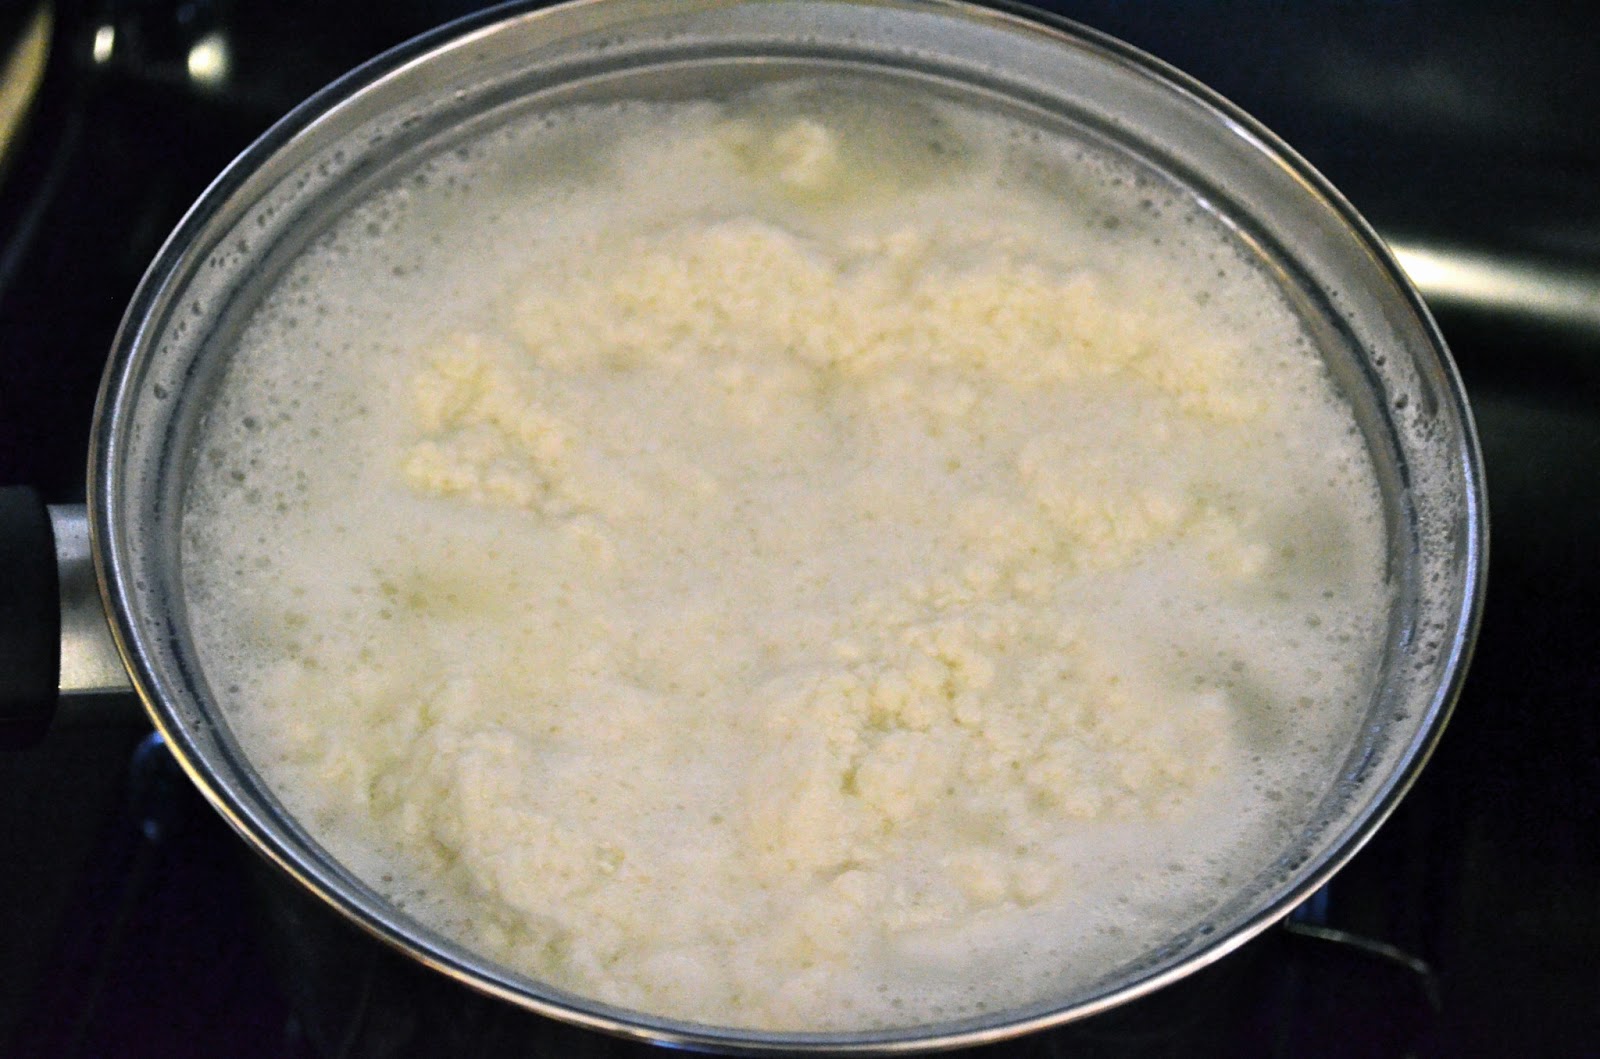
- Milk starts curdling and whey gets separated.Keep stirring until you see a clear whey.

- When curdled milk comes to the center and raises as it boils, switch off your stove.
- Spread a muslin cloth/cheese cloth(Make sure its enough to get tied up) and drain the curdled milk.

- Now bring the edges of the cloth together and immerse it(up and down process) in a bowl filled with ice cubes-cold water. Slightly rub the bag so that it releases the lemon juice flavor and bring the curdled milk together to a ball.

- Squeeze the excess water and tie the bag. Hang it on your shelf holder or water tap for 1-1/2 hours and do not disturb the setting.

- Now on a flat plate, first place the sack, then a tawa or plate and finally some heavy weight. This helps to squeeze all excess water. Let it set for 2 more hours without disturbing the setup.

- Open the knot and Remove the paneer from the cloth to your dicing board and cut them to your required size or to pieces.


- Store them in an air-tight container or ziplock. It can be used upto a week if refrigerated.

Note:
- We can use whole milk or skimmed milk or organic milk, whichever is used in your family.
- Remember to use lemon juice and curd in room temperature. using curd directly from the refrigerator not only takes more time in curdling the milk but also will not mix well with the milk.
- The whey water can be used for making chappathi batter.
- Immersing paneer in ice-cube filled water bowl helps to cool down the heat easily and makes it easier to remove the lemon flavor.
- Try to squeeze the maximum water possible before hanging.
- The time to drain water depends on the cloth you use to strain. always use a muslin cloth or thin cotton cloth(with more pores).
- Do not rush with drain process. Give time to set. Remember there is nothing wrong in draining longer because the more the water gets drained the perfect the paneer will be.
- I prefer to simply hang and drain water when i need crumbled paneer for making Malai kofta, Paneer cutlets.
- Putting on the weight is to release the last drop of water and to get the paneer set well as it helps in cutting them to cubes.
- Refrigerate paneer after cutting them to pieces in case your are not using them immediately.
- Use the homemade paneer within a week's time preferably.
