These are little things that I always wondered when my granny makes them. The way she used to sit and whisk the curd and bring up the butter is a lovely process to watch. I peep now and then during my playtime to see if the butter is done... Finally when my grandma calls out "Venna thelinchu kuttiyolle" (Butter has cleared kids) we feel like having prasad from temples. I always had a thought that its my granny's magic curd.
The butter she made were so tasty from the cow's milk from our own farm - they were rich, tasty and amazing. She gives everyone small balls of butter for eating and says that "Bhakki Neyyunannu" (Remaining is for making ghee). Though we feel sad the butter quota is over, we were more happy that we can have the ghee for rice and parippu kadanchathu.
As days passed my mom started making ghee using "Paal Aada" (Cream of milk after boiling). She stores them for 15 days in a glass jar and sharp on day 16 she makes ghee. The smell while making ghee is so strong that it reaches our neighbors downstairs.
Today am happy that am making some fresh ghee for my daughter though its not from homemade butter - I feel satisfied that they are farm fresh and with the same taste and smell. Most of all Indian Desserts / Sweets use Ghee as one major ingredient that enhances the taste and flavor.
Ingredients:
Butter (unsalted - Farm fresh / Homemade / Store brought)
Salt - a pinch
(My friend Pradheepa Chinnaraj advised to add the following ingredients along with salt if interested - "Some Fresh Curry leaves or Drumstick leaves")
Method:
- Heat a pan, set the temperature to medium low and add the required amount of butter you need to the pan(Its better to have the butter in room temperature).
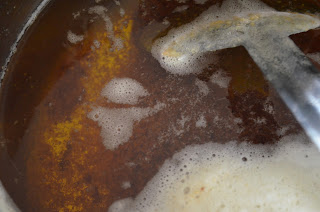
- When the butter melts we will see white foam starting to form. This means it will start to boil in some time. Keep stirring continuously to avoid burning.
- When the butter starts to boil the foam slowly starts to disappear and froth starts forming.
- Keep stirring in the medium low flame and we can see that the butter changes its colour to light brown and we can see the bottom of the pot through it.
- Switch off and let it sit to cool down to room temperature. If you want to add some curry leaves or drumstick leaves like my friend advised, this would be the time. We can see the sediments settled down.
- Take a tea strainer or muslin cloth and strain the ghee. Add a pinch of salt and stir well(This is done in order to form the granules in ghee).
- Please don't throw the residue as it can be used as face or body scrub like i do.
- Fresh ghee is ready to use. The ghee gets set to semi solid state after some time.
My Notes:
- The time taken to prepare ghee differs from the amount of butter we taken, the more the quantity the higher the time. it took me around 25 minutes to complete the stove top process alone because I made ghee with 4 Lb butter.
- Please don't throw the residue after straining. it is excellent for using as face or body scrub.
- Salt is used to give the grainy structure for the ghee. Don't use more than a pinch per litre of ghee.
- I am not aware of the benefits of using curry leaves or drumstick leaves. I feel it is used to enhance the flavor and smell of the ghee.


